Saturday, December 31, 2011

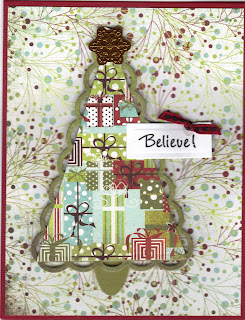
Mod Santa


This modern Santa went well with this modern patterned Christmas paper.

Natalie

Card Recipe
Stamp: Stampendous (?)
Papers: white cardstock (Georgia Pacific), green & red cardstocks (Bazzill), patterned (K & Co.)
Ink: Versafine Onyx Black
Accessories: Spellbinder Labels 1, ribbon (Fabricland), buttons (stash), chalk (Pebbles Inc.), markers (Copic)

Friday, December 30, 2011

And the stockings...


I can honestly say that I created this card from scratch. Should have, however, put a piece of white cardstock on the tops of the stocking before adhering the Flower Soft so it wouldn't be as transparent. I knew the sheet of wood grained patterned paper that I had would come in handy some day. Still looking for burning logs to fill the fireplace.

Natalie

Card Recipe
Stamp: Impression Obsession
Papers: Core'dinations Distress Fired Brick, wood patterned paper (Paper Pizzaz), other patterned papers (BG Eskimo Kisses)
Inks: Distress Walnut Stain, Staz On Timber
Accessories: stocking die (PTI), Polar White Flower Soft, brads & jute (stash), Bricked embossing folder (Sizzix)

Thursday, December 29, 2011

Strung Tree


Same tree, decorated with the same string of clear beads.

Natalie

Card Recipe
Papers: blue & green cardstock (Bazzill), patterned (BG Eskimo Kisses), doily (Wilton)
Ink: Distress Peeled Paint
Accessories: string of beads (Linda G.), sticker (Stampendous), Sizzix Bigz tree die

Wednesday, December 28, 2011

Another Beaded Border


Instead of paper or ribbon for a border, this time I chose a string of clear beads. I used double sided tape to adhere it to the cardstock.

Natalie

Card Recipe
Papers: green cardstock (Lasting Impressions), patterned (Webster's Pages)
Ink: Distress Peeled Paint
Accessories: Sizzix Bigz Tree die, beads (Linda G.)

Tuesday, December 27, 2011

Row on Row


Sorry for the blurry scan, but the knot in the bow was the culprit. I've made a card of this design before in red, white and black, which was very popular. This is my Christmas version of the same card.

Natalie

Card Recipe
Stamp: Wendy B.
Papers: white cardstock (Georgia Pacific), burgundy cardstock (Bazzill), patterned (BG Eskimo Kisses)
Ink: Versafine Onyx Black
Accessories: Spellbinder Labels 1, ribbon (Fabricland), button & yarn (stash), border punch (EK), Copic markers

Monday, December 26, 2011

My Favourite Christmas Card


This would be my first choice out of all of the cards I've made this season. Not an original idea, but my own version of it. I didn't have a cardinal, so I created one by cutting an extra piece of cardstock for the top of his head and colouring his "face" in black.

Natalie

Card Recipe
Stamp: Studio G
Papers: green & red cardstocks (Bazzill), white cardstock (Georgia Pacific), patterned (BG Wassail)
Inks: Distress Shabby Shutters & Peeled Paint, Memento Rhubarb Stalk
Accessories: Spellbinder Labels 5 & Bird Sanctuary, ribbon (Fabricland), fern punch (MS)

Sunday, December 25, 2011

Merry Christmas


I used the word dies with patterned paper for a different twist.

Natalie

Card Recipe
Papers: burgundy cardstock (Bazzill), patterned (MME Lost & Found Christmas)
Accessories: word die (PTI), bird embellishment (K & Co.), word sticker (Karen Foster)

Saturday, December 24, 2011

Light It Up


I used my new Sizzix tree die with solid cardstock, but had to decorate it with rhinestones.

Natalie

Card Recipe
Stamp: Rubber Stampede
Papers: green & red cardstock (Bazzill), patterned paper (K & Co.)
Ink: Versafine Onyx Black
Accessories: rhinestones (Kaiser), Sizzix Bigz tree die, Spellbinder Long Rectangles Small

Friday, December 23, 2011

Happy Holiday


Added a little sparkle to this word die by covering the dot for the "i" with garnet Stickles.

Natalie

Card Recipe
Stamp: PTI
Papers: green cardstock (stash), patterned (Daisy D's), white cardstock (Georgia Pacific)
Ink: Bazzill Juneberry Dye
Accessories: ribbon (stash), Spellbinder Megal Ovals Large, word die (PTI)

Thursday, December 22, 2011

Very Merry


Here's the second of 3 words in the Papertrey Ink set of word dies.

Natalie

Card Recipe
Stamp: PTI
Papers: bone cardstock (stash), red & green cardstock (Bazzill), patterned (Making Memories)
Ink: Brilliance Pearlescent Chocolate
Accessories: word die (PTI), holly punch (Marvy), 1/4" circle punch, button (Nadine K.)

Wednesday, December 21, 2011

Seasonal Die Cut Words


I love, love, love the new Papertrey Ink word dies that coordinate with a set of their word stamps. Mixing fonts is something new and fun.

Natalie

Card Recipe
Stamp: PTI
Papers: bone cardstock (stash), red & green cardstock (Bazzill), patterned (Making Memories)
Ink: Brilliance Pearlescent Chocolate
Accessories: word die (PTI), button & yarn (stash), poinsettia embellishment (K & Co.)

Tuesday, December 20, 2011

Jumbo Poinsettia


I created a fuller poinsettia by doubling the second and third layers of the flower. Distress Inks softened the edges of both the flower petals and the leaves.

Natalie

Card Recipe
Stamp: PTI
Papers: bone cardstock (stash),green & red cardstocks (Bazzill), patterned (Making Memories)
Inks: Distress Shabby Shutters & Fired Brick
Accessories: Spellbinder Poinsettias, button (Nadine K.)

Monday, December 19, 2011

Wool Felt Trees


Here I've combined two things that I love--wool felt and my new tree die. Buttons go hand in hand with felt, so no better way to embellish this tree.

Natalie

Card Recipe
Papers: red & green cardstock (Bazzill), patterned (Daisy D's)
Accessories: wool felt (PTI), buttons (stash), border punch (EK)

Sunday, December 18, 2011

Super Snowflakes


I found these larger snowflake embellishments on sale after Christmas. You can find card embellishments in all kinds of places. I tied the ribbon to the hole in the snowflake so that it could dangle freely and give the card motion.

Natalie

Card Recipe
Papers: green cardstock (Bazzill), white cardstock (Georgia Pacific), patterned (Daisy D's)
Accessories: ribbon (stash), Spellbinder Fleur de Lis Squares, snowflake

Saturday, December 17, 2011

Santa Post


Couldn't wait to use this new image just as it was meant to be used--as a canceled stamp.

Natalie

Card Recipe
Stamp: Inkdadinkado
Papers: green cardstock (stash), patterned (Daisy D's)
Ink: Brilliance Pearlescent Poppy
Accessories: ribbon & buttons (stash)

Friday, December 16, 2011

A Candy Cane Kiss


Wendy's candy cane confetti came in handy when I needed something to top my bow. Adhered two together with Glossy Accents.

Natalie

Card Recipe
Papers: blue cardstock (Bazzill), patterned (K & Co.)
Accessories: dry embossed image (Judy G.), ribbon (Fabricland), Spellbinder Ovals & Scalloped Ovals, holly sticker (K & Co.), Glossy Accents

Thursday, December 15, 2011

Cheque It


Originally I cut this card base 8 1/2 inches wide, to fit some envelopes I purchased. However, I found this a long card base to work with. Consequently, I cut the base to fit a cheque envelope and the area is much more accommodating. It allowed me to use a scrapbooking border sticker.

Natalie

Card Recipe
Stamp: ?
Papers: green & red cardstock (Bazzill)
Ink: Encore Gold
Accessories: stickers (Karen Foster)

Wednesday, December 14, 2011

NOEL


I'm still on the fence about highlighting the dry embossed NOEL on this card. Darker cardstocks tend to make dry embossing more difficult to recognize.

Natalie

Card Recipe
Papers: green & red cardstocks (Bazzill), patterned paper (?)
Accessories: stencil (Lasting Impressions), Spellbinder Scalloped Rectangles, ribbon (Fabricland)

Tuesday, December 13, 2011

Frosted Snowman


The white paper I punched the snowman out of is a piece of handmade paper I received. These types of paper add beautiful texture to anything.

Natalie

Card Recipe
Papers: green & pink cardstocks (Bazzill), patterned (K & Co.), white (stash)
Accessories: buttons (stash), Spellbinder Labels 21, ribbon (Fabricland), snowman punch (EK)

Monday, December 12, 2011

Candied


Because part of this dry embossed image was on a white background, I needed to highlight the raised areas. I placed the brass stencil back onto the dry embossed paper and carefully sprayed over the stencil with Glimmer Mist. Using the mist sparingly ensured that excess liquid did not build up on the surface of the stencil and drip onto the paper.

Natalie

Card Recipe
Papers: white cardstock (Georgia Pacific), red cardstock (scrap), patterned (Reminisce)
Accessories: brass stencil (Lasting Impressions), Glimmer Mist (Santa Baby)

Sunday, December 11, 2011

All in the Family


I tend to use this stamp every Christmas. The vintage look of it worked with this patterned paper by Webster's. Stamping with a crackled background stamp over the image makes it look even more vintage.

Natalie

Card Recipe
Stamp: PSX
Papers: off white cardstock (Staples), patterned (Webster's)
Inks: Staz On Timber, Distress Vintage Photo
Accessories: Spellbinder Labels 18, Copic markers

Saturday, December 10, 2011

Ink the Pink


I enjoy making cards of different colours for the same occasion. The pink and green make a "fresh" Christmas card. Though the pink paper was simply a distressed pattern, I enhanced it by randomly stamping the poinsettias and flowers all over it.

Natalie

Card Recipe
Stamps: SU
Papers: green cardstock (Bazzill), patterned (BG Sultry)
Inks: ColorBox Dusty Plum, PSX Sentiment Wood Rose
Accessories: Spellbinder Rectangles, button (Nadine K.), ribbon (Fabricland)

Friday, December 9, 2011

Paper Buttons


Without the perfect button on hand, I decided to make one out of patterned paper. After punching out the circle, I inked the edges to give it a finished look.

Natalie

Card Recipe
Stamp: Inkdadinkado
Papers: green cardstock (stash), patterned (MME Union Square)
Inks: Encore Gold, Distress Tea Dye
Accessories: Fine Gold embossing powder, ribbon (Fabricland), circle punch (Marvy)

Thursday, December 8, 2011

Pink Wreath


Here's a unique take on a wreath--pink and sparkly. Rhinestones would have competed for competition with the glitter embossing powder, so I chose pink pearls instead.

Natalie

Card Recipe
Stamps: wreath (Hero Arts), sentiment (PTI)
Paper: kraft cardstock (Bazzill)
Inks: Colorbox pink and Staz On Timber
Accessories: Rose Quarts Embossing Powder (PSX), pearls (Kaiser), ribbon (stash)

Wednesday, December 7, 2011

Poinsettia Wreath


I stamped the wreath twice, turning the stamp just slightly and not reinking it when stamping it the second time. Did not emboss so I could stamp directly on the wreath with the small poinsettia stamp.

Natalie

Card Recipe
Stamps: wreath (Hero Arts), small poinsettia (Studio G)
Papers: white cardstock (Georgia Pacific), red cardstock (Bazzill)
Inks: Brilliance Pearlescent Poppy, ColorBox Evergreen
Accessories: embossing folder (SU), ribbon (Fabricland), brads (stash)

Tuesday, December 6, 2011

Berry Wreath


I decorated this wreath with berries (pearls). Glitter embossing powder gives it a little sparkle.

Natalie

Card Recipe
Stamps: image (Hero Arts), sentiment (PTI)
Paper: white cardstock (Georgia Pacific)
Inks: ColorBox Evergreen, Versafine Onyx Black
Accessories: pearls (Kaiser), ribbons (stash), Shimmering Leaves embossing powder

Monday, December 5, 2011

Solid Trees


I love how some of the newer stamps are mostly solid, with some pattern within the design.

Natalie

Card Recipe
Stamps: SU
Papers: white cardstock (Georgia Pacific), green cardstock (Bazzill Weeping Willow)
Ink: Pine Tree (Memories Dye)
Accessories: embossing folder (SU), ribbon (Fabricland)

Sunday, December 4, 2011

Chalk/Ink?


I chose chalk over Distress Inks for this resist because I wasn't drawing the ink tool from the side of the paper and was worried about getting sponge lines with the distressing tool. After stamping and heat embossing the wreath in white, I applied the chalk.

Natalie

Card Recipe
Stamps: image (Hero Arts), sentiment (Penny Black)
Papers: white cardstock (Georgia Pacific), patterned (MME Union Square)
Inks: ColorBox Frost, Encore Gold, Distress Vintage Photo
Accessories: white embossing powder, rhinestones (Kaiser), jute (stash), bird die (Sizzix Bigz Caged Bird)

Saturday, December 3, 2011

Hanging Ornaments


Saw this idea to use pearls to hang ornaments and thought it was so elegant.

Natalie

Card Recipe
Stamp: Flourishes
Papers: red cardstock (Bazzill), patterned (BG Figgy)
Ink: Adirondak Raisin Dye
Accessories: string of pearls (Wendy B.), Spellbinder Classic Rectangles Small & Circles, ribbon (stash)

Friday, December 2, 2011

Icy Blue


An icy blue colour is always nice to incorporate into Christmas cards, mimicking the frost of winter weather. This blue is already found in the patterned paper used for the ornament.

Natalie

Card Recipe
Stamps: Impression Obsession
Ink: ColorBox Robin's Egg
Papers: white cardstock (Georgia Pacific), green cardstock (Bazzill), patterned (BG Figgy)
Accessories: Spellbinder Standard Circles Small, Copic markers, Fiskars border scissors, silver cord (stash)

Thursday, December 1, 2011

Triple Threat


This background was created by repeatedly stamping a swirl. It provided the perfect design to "hang" 3 ornaments.

Natalie

Card Recipe
Stamps: sentiment (Imaginisce), image (SU)
Papers: white cardstock (Georgia Pacific), blue & red cardstocks (Bazzill)
Ink: ColorBox Robin's Egg Blue
Accessories: Spellbinder Standard Circles Small

Wednesday, November 30, 2011

Just Circles


The next best thing to having an ornament stamp and matching punch is using Spellbinder Circle dies and patterned papers.

Natalie

Card Recipe
Stamp: Impress
Papers: white cardstock (Georgia Pacific), patterned (BG Wassail)
Inks: ColorBox Dark Moss & Deep Green
Accessories: ribbon (stash), fabric label (Making Memories)

Tuesday, November 29, 2011

Chunky Glitter


I was pleased to learn that chunky glitter is still translucent enough to reveal the stamped image under neath, while giving the card more texture than regular glitter.

Natalie

Card Recipe
Stamp: Just Rite
Papers: white cardstock (Georgia Pacific), green & red cardstock (Bazzill), patterned (Reminisce)
Ink: Versafine Onyx Black, Distress Tumbled Glass
Accessories: Spellbinder Circles & Scalloped Circles, ribbon (Fabricland), glitter (Elmer's), Copic markers

Monday, November 28, 2011

Sepia/Black?


The card idea I copied used black ink to stamp the image. I thought sepia might be a good idea, however, I think the black might have worked better with the red and white flower and twine.

Natalie

Card Recipe
Stamp: Inkadinkado
Paper: kraft cardstock (Bazzill)
Ink: ColorBox sepia
Accessories: twine (MS), flowers & brad (stash)

Sunday, November 27, 2011

Peaceful Dove


This cut out from an old Christmas card lent itself to tiny alpha stickers. The watermelon Bazzill cardstock was a perfect match in colour to the switch in the image.

Natalie

Card Recipe
Papers: watermelon & kraft cardstocks (Bazzill)
Accessories: Birds & Swirls embossing folder (Cuttlebug), ribbon (stash), tiny alpha letters (MLS), Spellbinder Rectangles

Saturday, November 26, 2011

Who's Driving?!


Here's another card front, which was significantly smaller than a standard card base, so I matted it with black paper. This brought out the character in the image. I'm still debating whether or not a small sentiment should be added to this...

Natalie

Card Recipe
Papers: white cardstock (Georgia Pacific), black cardstock (stash)

Friday, November 25, 2011

Still Believing


I matched the dark blue cardstock to the dark blue in the card front I took from a commercial card. This enhanced the gold frame around the image.

Natalie

Card Recipe
Paper: blue cardstock (Bazzill)

Thursday, November 24, 2011

Scrawny Santa


Can't say I'd buy a die like this again. The many small parts took some time to assemble. The die cuts had to be made several times in order to get the pieces in different colours. Lesson learned.

Natalie

Card Recipe
Papers: white cardstock (Georgia Pacific), red cardstock (Bazzill), black cardstock (stash)
Ink: Colorbox
Accessories: santa die (?), border stickers (?)

Wednesday, November 23, 2011

"Regifting"


I've "regifted" another card by mounting a card front on a new card base.

Natalie


Tuesday, November 22, 2011

The Supporting Cast


Dry embossed image without colour can get lost on a card front. A richly coloured patterned paper behind the image can give it what it needs to stand out.

Natalie

Card Recipe
Papers: white cardstock (Georgia Pacific), patterned (BG Wassail)
Ink: Distress Walnut Stain
Accessories: brass stencil (Lasting Impressions)

Monday, November 21, 2011

Building an Image


It took 3 different stamps and 4 colours of ink to build this image, but it was well worth it. Try using different combinations of your stamps to create original images.

Natalie

Card Recipe
Stamps: berries (SU), branch (Impress), acorn (Hero Arts), sentiment (Hero Arts)
Papers: off white cardstock (Staples), green cardstock (Bazzill)
Inks: ColorBox Warm Red & Dark Moss & Olive Pastel & Dark Brown
Accessories: ribbon (Fabricland)

Sunday, November 20, 2011

poinsettia


I appreciate that these poinsettia stamps by Heartfelt were made to be used with the Spellbinder Blossom 2 dies.

Natalie

Card Recipe
Stamps: Heartfelt
Papers: cardstocks (Bazzill), patterned (BG Wassail)
Inks: Distress Aged Mahogany, ColorBox Chalk Deep Green, CTMH Topiary, Copic markers, pearls (Kaiser)

Saturday, November 19, 2011

Rudolph to the 9's


Dressed Rudolph up for Christmas with some clear rhinestones.

Natalie

Card Recipe
Stamp: Inkdadinkado
Papers: white cardstock (Georgia Pacific), burgundy cardstock (Bazzill), silver cardstock (stash), patterned (stash)
Ink: Distress Aged Mahogany
Accessories: sticker (Stampendous?), rhinestones (Kaiser), border punch (EK), Spellbinder Rectangles, silver cord (stash)

Friday, November 18, 2011

Ornamental Buttons


To continue with a folk theme, I used buttons to decorate this Christmas tree.

Natalie

Card Recipe
Stamp: Hero Arts
Papers: cardstocks (Bazzill), patterned (BG Wassail)
Ink: Adirondak Raisin Dye
Accessories: tag die (Quickutz), Spellbinder Pennants & Scalloped Pennants, cord (stash), buttons (stash), brads (stash)

Thursday, November 17, 2011

Blinged Out Snowman


To give this "man" a little more pizzaz, I decorated him with a swirl of rhinestones.

Natalie

Card Recipe
Papers: green cardstock (Bazzill), patterned (BG Wassail)
Accessories: snowman punch (EK), snowflake (stash), button (stash), rhinestones (Zva)

Wednesday, November 16, 2011

Oh Deer!


To bring attention to the deer in the patterned paper, I used Glossy Accents to give his eye dimension and shine. For a change, I strung pearls on the tree, instead of lights.

Natalie

Card Recipe
Papers: cardstock (Bazzill Juneberry & Sparkle), patterned (BG Eskimo Kisses)
Ink: Distress Peeled Paint & Aged Mahogany
Accessories: tree punch (EK), string of pearls (Wendy B.), Glossy Accents, Spellbinder Classic Ovals Large, brads (BG)

Tuesday, November 15, 2011

Assorted Trees


Here I used the Nested Pennants and a variety of patterned, coordinating papers for a grouping of trees.

Natalie

Card Recipe
Stamp: Paper Inspirations
Papers: cardstock (Bazzill Seabreeze), green cardstock (Bazzill), burgundy cardstock (scrap), patterned (BG Figgy)
Ink: Versafine Onyx Black
Accessories: border punch (EK), Spellbinder Nested Pennants & Petite Scalloped Circles Large & Standard Circles Small & Classic Ovals Large, ribbon (Fabricland)

Monday, November 14, 2011

Another Framed Scene


Since these types of detailed images don`t lend themselves to colouring, I try to showcase them by framing them with patterned paper.

Natalie

Card Recipe
Stamp: ?
Papers: green cardstock (Bazzill), off white cardstock (Staples), patterned (MME Christmas)
Ink: Adirondack Raisin Dye
Accessories: Spellbinder Petie Ovals Large & Fancy Tags, Copic marker

Sunday, November 13, 2011

The 25th


I love to incorporate these large number dies into the theme of a card whenever I can.

Natalie

Card Recipe
Papers: red & green cardstocks (Bazzill), white cardstock (Georgia Pacific), patterned (Reminisce)
Accessories: metal embellishment (Making Memories), number dies (PTI), flower punch (MS), border punch (MS)

Saturday, November 12, 2011

Spellbinder Pennants


As soon as I saw these dies, I knew exactly what I was going to do with them--make Christmas trees! There are a number of different ways to use these dies, the first of which is with patterned paper. Just be sure to be cognizant of the pattern in the paper so that lines which are supposed to be vertical are not slanted, making the tree look like it`s falling over.

Natalie

Card Recipe
Stamp: Hero Arts
Papers: cardstock (Bazzill Pomegranate, Dark Olive), patterned (BG Figgy Pudding), white cardstock (Georgia Pacific)
Ink: Versafine Onyx Black
Accessories: Spellbinder Nested & Scalloped Pennants, Long Classic Rectangles Small, ribbon (stash), oval punch (SU), star sticker (K & Co.)